Diving the SS Yongala:
Introduction – Why Dive the Yongala: The wreck of the SS Yongala is undoubtably one of Australia’s best dives, and is even a regular contender in most international top-ten dive site listings. In my view, this is because of the fish life, rather than the wreck itself. Purist wreck divers would not consider this a proper wreck dive due to laws preventing its penetration, but for me the attraction is the ability to see such a huge array of marine life in one small area. In good visibility, diving here can feel like you are taking a tour through the pages of Grant’s Guide to Fishes, with virtually every warm-water species represented in some way.
Getting there with Commercial Operators: Townsville based commercial operators such as Pro Dive Magnetic Island, service the Yongala with day trips. Adrenalin Dive offer both day trips and live-aboard trips, and Affordable Charters Group (ACG) operates live-aboard trips. Extended trips usually attempt to showcase both the wreck and the GBR, taking customers to quality reefs such as Wheeler, Helix, Loadstone, or Keeper, in addition to the Yongala. On a live-aboard trip, the sequence of sites visited (reef or wreck first) will generally depend on conditions at the wreck site rather than the reef, due to the exposed location of the wreck.
Adrenalin Dive and ACG depart from the Townsville mainland, whereas Pro Dive is located on the island. Depending on the vessel, transit time from Townsville can be up to 3 to 3.5 hours (not including any time required to collect customers from the island – if this applies). The Yongala Dive Company near Ayr conducts daily trips to the wreck departing from Alva Beach. Their close proximity allows them to reach the site in under 30 minutes in good conditions.
Both options (Townsville or Ayr) have advantages and disadvantages, depending on a number of factors. For example, if you plan to be on Magnetic Island, then Pro Dive is your nearest operator, although the Adrenalin boats will pick up and drop off at the island. In good weather, the trip down and back can be a memorable part of the experience, and skippers will often pass close enough to prominent features such as the Cape Cleveland Light House, Four and Twenty Foot Rocks, and Salamander Reef to give you a good view. Keep a close eye out for turtles along the seaward side of Cape Cleveland during September, as turtles seem to congregate here around this time of year.
Obviously, the reverse is true for the Townsville transit, and your journey can get a little uncomfortable in poor conditions. If you have less time available, or your sea legs are not as steady as you’d like, then travelling down from Townsville by car and then out to the wreck from Alva Beach may be more suitable.
Private Yongala Permits: If you have a suitably large boat or a friend with one, then you may have considered applying for a permit to visit and dive the Yongala privately. In 2012, NQUEC applied to the Department of Environment and Heritage Protection for a permit, and received approval to dive the wreck from a private vessel owned by a club member. At the time, the permit allowed the skipper to visit the site with club divers over ten occasions in a 12-month period for around $400. Permits are tied to an individual and a specific vessel, and ours carried some strict conditions. All divers aboard each of our trips still had to pay a daily fee of $15 which the skipper collected and later submitted, but it gave us the ability to conduct our own trips, and to plan our dives catering to our specific desires. For example, the permit allowed for over-night stays, so we conducted dawn dives, dusk dives, and night dives on the wreck over full weekend trips, which gave us exclusive access to the wreck both before and after the commercial day boats visited. Our permit also included detailed instructions on which moorings to use, how to connect to them with a frangible link, how to use the descent/ascent lines, plus guidelines for complying with the Historic Shipwrecks Act 1976.
Obviously, our permit experience is from 2012, so conditions and eligibility would need to be checked today, and there may now be specific survey requirements for your vessel.
Dealing with Current: One of the factors which makes this dive so impressive; the lack of any other nearby structure (which results in the wreck attracting huge amounts of marine life), also contributes to its biggest challenge; swell and current. All regular Yongala operators plan their diving based on slack water around the top or bottom of the tides, but on some days; diving with a strong current is unavoidable. Here are some simple recommendations that you might find helpful:
- If you have not dived for a while, consider first completing some reef or island dives to re-gain your confidence in the water. NQUEC often runs lead-up trips for our divers in preparation to a Yongala dive, so members can practice their skills and familiarise themselves with their gear.
- Know your gear and how it operates, as current and swell make everything harder when you’re exerting yourself. For example; if you accidentally drop an integrated weight pouch during your dive, then you need to know how to vent air quickly. Check your BCD to ensure it properly inflates and deflates. If you have hired gear, don’t be scared to give it a really thorough check-out before you get to the dive site, as you’re better off looking a little obsessive and compulsive now, rather than trying to learn how to use the gear in the water whilst battling a current.
- Obviously, your gear needs to be in a good state of repair for any dive, but I also recommend checking the condition of your mask strap and its associated clips, and checking the condition of your regulator’s mouth piece and its associated cable tie. I’ve seen an old perished mask strap separate from the mask, and a mouth piece split and come away from the regulator housing during high-current Yongala dives, and both situations caused stress for the divers involved.
- Make sure your cylinder is firmly attached to your BCD. Seems obvious, but I’ve had to re-secure a cylinder for my buddy whilst in the water on a Yongala dive and it wasn’t an easy task! Wetting the cylinder band before clamping it over a tank truly works well.
- Prepare your gear to be streamlined and securely attached as best as possible. For example; use gear retractors for gauge consoles, use quality gear keepers for your alternate regulator, and use lanyards for any small items such as slates, torches, and cameras. Lanyards also give you the ability to safely let go of these items to free up both hands if you need to.
- Position high-use items within easy reach. For example; if you are like me and tend to annoy your dive buddy with lots of underwater slate comments, then make sure these items are in an easily accessible location, remembering that the zipper for a pocket when you are swimming and weightless won’t be in the exact same position as it was when you were standing with the full weight of the tank acting on the BCD.
- Do a comprehensive pre-dive buddy check, to not only understand their specific gear configuration, but to also ensure all their equipment is properly adjusted and securely attached.
- Dive with gloves; even if you only use the thin fabric tradesman’s gloves from Bunning’s, as you need to maintain contact with the descent/ascent line, and razor-sharp little beasties like barnacles and muscles often attach themselves to the rope.
- Don’t skimp on your fins. If you’ve money to spend outside of your basic SCUBA unit, then buy the best quality fins you can find that are suited to your size and leg strength. Money spent on your ability to propel yourself through the water is never wasted.
- Make sure you are correctly weighted. Consider using extra weight to counter the use of under-suit vests or hoods, and also consider whether you are using aluminium or steel cylinders, as some folks find steel tanks noticeably heavier in the water. If in doubt, inform the staff that you’d like to do a quick buoyancy check, and they will give you a mermaid line to help you test your buoyancy at the stern, away from other divers.
- And finally, don’t forget to arrive with a snorkel and a SMB, as these are must-haves for customers diving with commercial operators at this site.
Some Advice during the Dive: The following information is not intended to be a substitute for a pre-dive brief. The Townsville and Ayr operators will go through the layout of the site, the in-water emergency air, their recall procedure, how to identify specific parts of the wreck, what marine life to expect, plus bottom time, No-Deco Limits, and safety stops. This essential information is really well presented by all the local operators, so the purpose of this following section is just to offer some recommendations for small things that might make your dive easier and more enjoyable.
When the weather is good, especially during the lead-up to a weekend or holiday period, there will likely be several operators all putting divers on the wreck at similar times. Therefore, it’s a good idea to memorise some aspect of your buddy’s gear which makes them unique from other divers, such as a particular colour or logo on their wetsuit, because when large numbers of divers are on the wreck it can be easy to mistake your buddy for another diver when groups meet.
After entering the water, you will make your way along the surface to a mooring buoy using the tether (or hook-up line) connecting the mooring to the dive boat. This first section of your transit to the wreck can sometimes be strenuous, especially if there are surface currents, swell, and multiple divers all trying to use the one line. If the tether is buoyant enough to remain on or near the surface, then try pulling yourself along the line with your arms, rather than finning. Using my arms works for me, because if I fin along a line I tend to get tangled in it, plus using your arms will reduce the chance of kicking your buddy in the face. Make yourself comfortable during the swim by inflating your BCD to its maximum capacity. If you’re are a bit of an ‘air-monster’ and tend to be frugal about wasting precious cylinder air to inflate your BCD prior to a dive, then you can still inflate your jacket manually before jumping in, by holding the deflate valve open and breathing into it whilst keeping your lips sealed over the opening in between breaths.
Once you reach the mooring buoy, or if you find the tether begins to droop below the surface near the buoy, do a final confirmation with your buddy, and start down the descent/ascent line. This last point is easy to overlook, especially during calm conditions, but using the descent/ascent line is an important Yongala procedure. For example, during an NQUEC trip when we had a private permit, one diver attempted their descent without using the line. They were swept away from the wreck by current, and luckily surfaced near another dive vessel.
I personally prefer to move down this line with my buddy at a reasonable speed, because at this stage, you have completed your buddy checks and you should now be correctly weighted, so unnecessary time spent on the descent/ascent line is time that could otherwise be spent on the wreck. As you near the wreck in about 12m of water, you will notice a second line branching off the descent/ascent line, whilst the main line continues on to the sea floor. Follow the line which branches off to the wreck. All of this will be clearly explained during your pre-dive brief, but I’ve touched on it here as-well, because the line which continues to the sea floor features in a recommendation further down the page. The bow and the stern both have similar descent/ascent lines, and the prevailing conditions will dictate which end of the wreck your skipper tethers to.
With the wreck resting on one side, both the bow and the stern overhang the sea floor and the resulting spaces attract schooling fish such as mangrove jack and sweetlips, plus big solitary fish such as QLD grouper. So use these overhangs to reach your deepest depth first. However, avoid swimming right underneath them because even though you are not technically entering the wreck, some operators warn divers not to put themselves in positions where their air bubbles can remain trapped against a surface of the wreck.
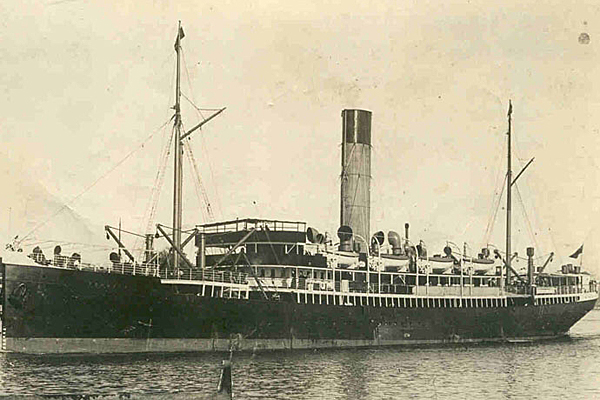
Considering the Yongala was built to 109m in length and currently rests on her starboard side, a good general concept for diving her is to choose a side; deck or port, and cruise along at depth until you reach the opposite end, before returning along the other side at a shallower depth. This will give you a good overview of the site, whilst maintaining a safe dive profile.
In good visibility, we recommend starting off along the deck side at depth, just above the sand a few meters away from the wreck. This way you can easily see various deck structures and marine life moving in and out of compartments, as well as the scenery and fish interactions over the sand. Some interesting fish behaviour can be seen over the sand just off the wreck such as sea snakes hunting around for small prey, and fish sorting out territorial disputes.
In 2011 just after TC Yasi, we swam along the sand just off the deck and noticed what appeared to be a cargo of bricks piled up on the sand right next to an opening in the deck. We wondered if the cyclone had rocked and rolled the wreck with enough force to cause the bricks to spill out, because the dive staff on the day could not remember seeing them prior to the cyclone. We weren’t sure what conditions to expect on the wreck immediately after TC Yasi, with some folks suggesting silty conditions could linger for weeks after a cyclone, but what we actually found was a big surprise. The whole wreck was virtually devoid of coral, as if the entire outer surface of the wreck had been pressure-cleaned, so much so that we could clearly see rows of rivet heads along the hull, all the port side glass port holes, and hinges for hatches and doors.
Whilst you’re travelling along at depth, don’t forget to keep a close watch on your No-Deco Limit. The commercial operators advise their customers not to exceed 10 minutes of available NDL. Be extra careful if you are trying hard to get some still pictures or film footage, because sometimes chasing that perfect photo opportunity can consume your concentration to the point where you forget to regularly track your depth, air, and NDL. Every diver is different, but I find the thing that limits my Yongala dives is not available air, but encroaching on NDL. So to mitigate this, I recently tried a wrist mounted computer instead of a console mounted computer. If I find something is easy, then I’m way more likely to do it. Quickly checking your wrist is much easier than trying to locate a console, and then move it away from your body far enough to view it, so I highly recommend wrist mounted computers.
Once you’ve reached the opposite end of the wreck, start your return in shallower water where the upper section of the port side meets the deck. In heavy current, it is possible to use the contours of the wreck to get a break from the moving water, without breaking the rules of no penetration. For example, if you position yourself over a low point such as one of the cargo holds, you will be lower than the surrounding structure so the current passes above you, and you have not entered the wreck or allowed your bubbles to remain trapped in it.
Don’t be disappointed if you hit your 120 Bar turn-around point before reaching the opposite end of the wreck, because the Yongala is one big cleaning station, and large animals such as sharks and rays often get cleaned just above the wreck in 12m to 15m of water. The 120 Bar turn-around point has been widely adopted by commercial operators, because it allows you to make your way back to your descent/ascent line and begin your trip back up to the boat with 70 Bar, allowing for 20 bar to be consumed during your safety stop. If you find that once you reach your ascent point you still have plenty of gas, then spend the last minutes of your dive having a closer look around the end of the wreck near your descent/ascent line, until you are ready to exit with 70 Bar.
On some days when conditions are really calm, and current is minimal, it is possible to see the dark outline of the wreck from the surface in your dive boat. On one such day, my wife and I moved a small distance off the bow and hovered over the sand in 20m of water near the bow descent/ascent line where it continues to the sea floor and attaches to its mooring block (as described above). From this point in really clear water (20m visibility), we were able to catch a glimpse of some really big fish life which probably hangs around the wreck all the time, but remains right out on the periphery and is probably rarely seen. Whilst there, we maintained visual contact with the wreck and the mooring block, and although we never quite saw complete outlines, we did see some very big shapes, fins, and tails!
Marine Life: As mentioned in the introduction, a good percentage of divers visiting the wreck each year probably do so to see the resident marine life. A Google search for ‘Yongala’ will return pages and pages of underwater imagery from both amateur and professional photographers. So rather than trying to list all the potential critters you could encounter on the wreck, I simply offer this recommendation: Purchase a copy of Max Gleeson’s 2018 documentary titled ‘SS Yongala – Mystery of a Generation’ to give you a really good example of what marine life to expect, as well as some interesting observations made on the history of the ship, it’s crew, and the events surrounding its loss.